Please read if you bought / want to buy a RAD Expansion Unit
I’m frustrated to see that some people try making money from open source projects of others although they have been released under a non-commercial license (such as the RAD Expansion Unit).The production cost for a complete RAD is below 10 Euros/Dollars per piece. There are a few commercial sellers with a permit to sell RADs. They have to not only cover production cost, but also pay taxes, bear additional expenses and comply with various regulations which justifies a higher price tag.
However, if someone who is NOT on the list below charges you more than 15€/$15 US/$20 CAD this is not only a violation of the license (commercial intent), but YOU have been ripped off. I don't blame you as the buyer, but perhaps you should ask the seller how he/she justifies this. Feel free to let me know about these sellers.
![]()
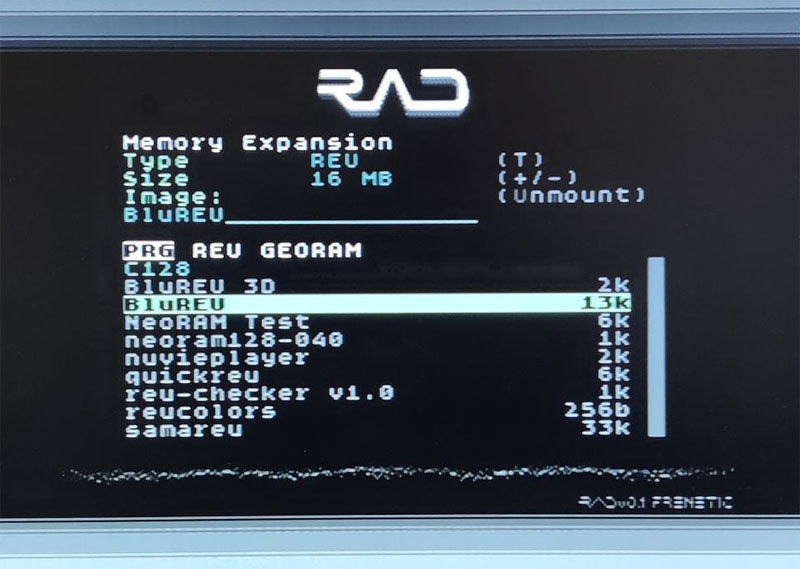
The RAD Expansion Unit is a cartridge/expansion for the C64 and C128 using a Raspberry Pi 3A+, 3B+ or Zero 2 to implement the actual functionality. Currently it emulates a RAM Expansion Unit up to 16mb (compatible to CBM 1700/1750/1764 REU, CLD Super 1750 Clone, CMD 1750/1750XL) and a GeoRAM/NeoRAM memory expansion up to 4mb. It also features a menu to browse, manage and launch REU- and GeoRAM-images, NUVIEs, and PRGs. The RAD is designed to not only emulate existing extensions, other things that have already been tested (but not yet included here) are, for example, MOS 6510/8500 emulation (incl. turbo mode) or using the RAD as a (co-)processor (in fact the menu runs on the ARM CPU only).
RAD's functionality is entirely defined by software. The connecting circuitry is quite simple and does not include any programmable ICs and is thus easy to build. It's a sibling of my other two projects: Sidekick64 and SIDKick.
RAD has been tested with various PAL-machines (C64s, C128, C128D) and NTSC-C64s. More tests with SX64, Ultimate64 and C64 Reloaded boards, RAMLink etc. remain to be carried out (not by me, I don't own such machines/devices).
This section summarizes building and setting up the hardware.
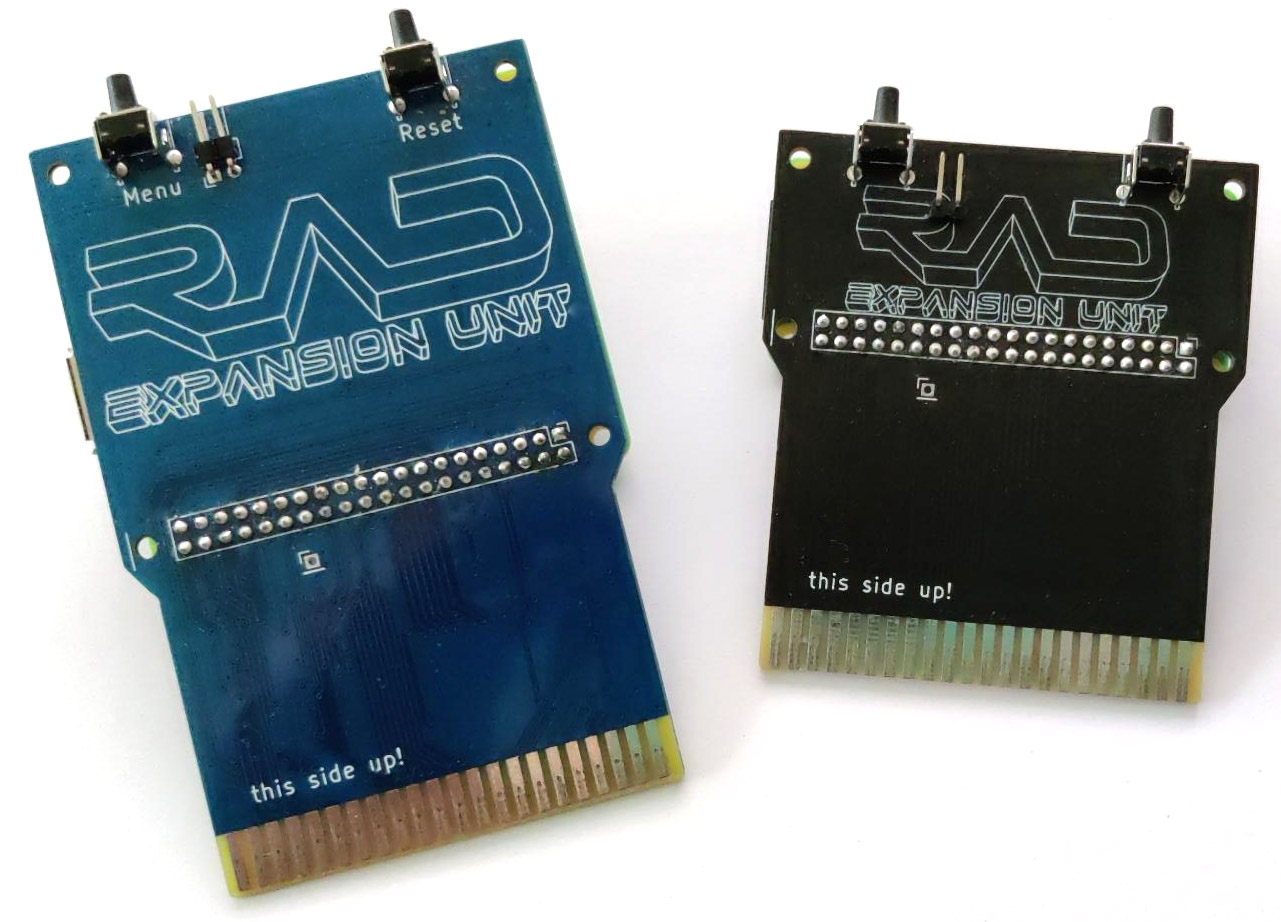
There are two variants of the PCB: a larger one that fits the dimensions of the Raspberry Pi 3A+/3B+ and a smaller one which is tailored for the Raspberry Pi Zero 2. All is interchangeable, i.e. you can use either PCB with any of the supported RPis.
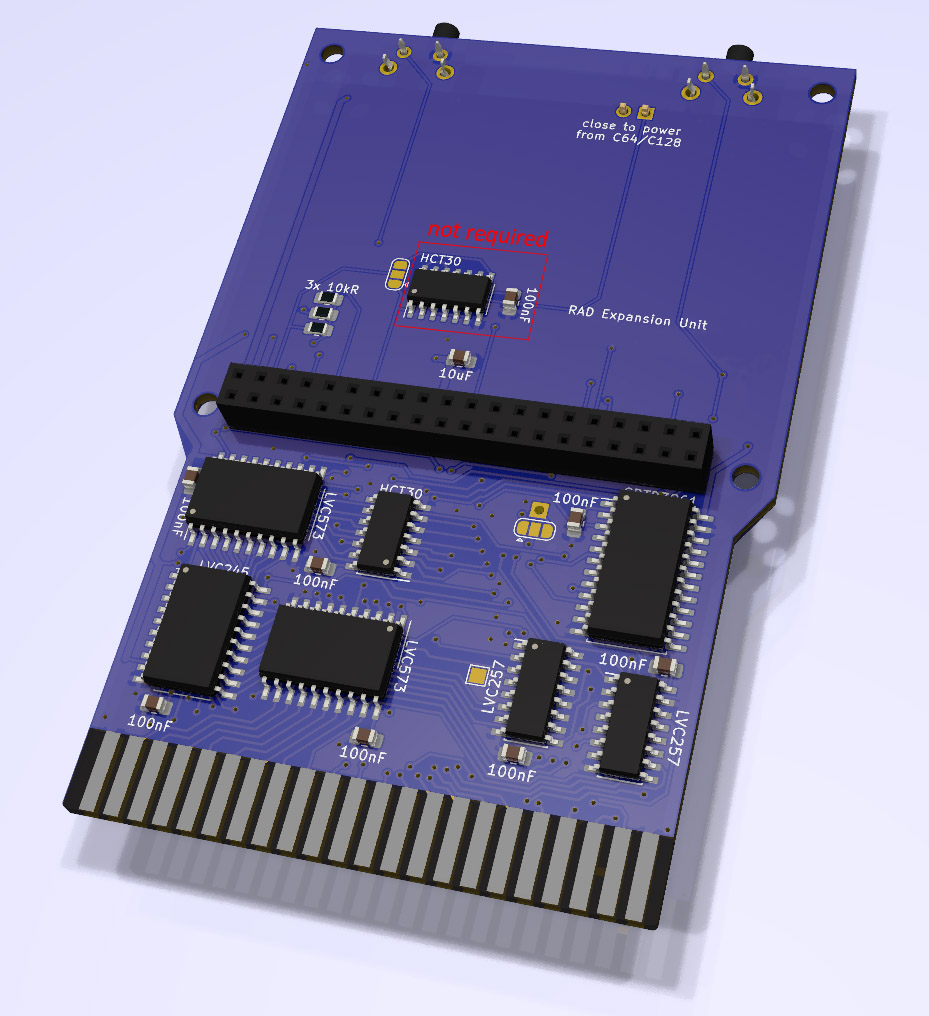
Here you can find the BOM and assembly information for RAD v0.1; both PCBs have exactly the same location of components, except for the buttons. Sourcing components: you can use LVC and LVX types for the 245, 257, and 573 ICs, you can use a 74LS30 or 74HCT30, make sure that you get the correct CBTD3861. The tactile switches, socket and ICs cost about 4 to 6 EUR/USD/CAD from reknown vendors such as Mouser, Digikey, TME if you buy components to 10 RADs (add about 20% if you only buy for one). Including the PCB the costs easily stay below 7 to 9 EUR/USD/CAD. (everything without shipping.)
If you want to support my projects, feel free to order the PCBs from PCBWay:
- RAD for RPi 3A+/3B+
- RAD for RPi Zero 2
- If you don't have an account at PCBWay yet: register via this link and get "$5 of New User Free Credit".
The Gerber files for PCB-production are also available in this repository if you want to order from another PCB manufacturer.
The first step when building the RAD is soldering the surface-mount components (bottom side only). Next solder the socket for the Raspberry Pi (2x20 female pin header), the pin header and push buttons. That's it!
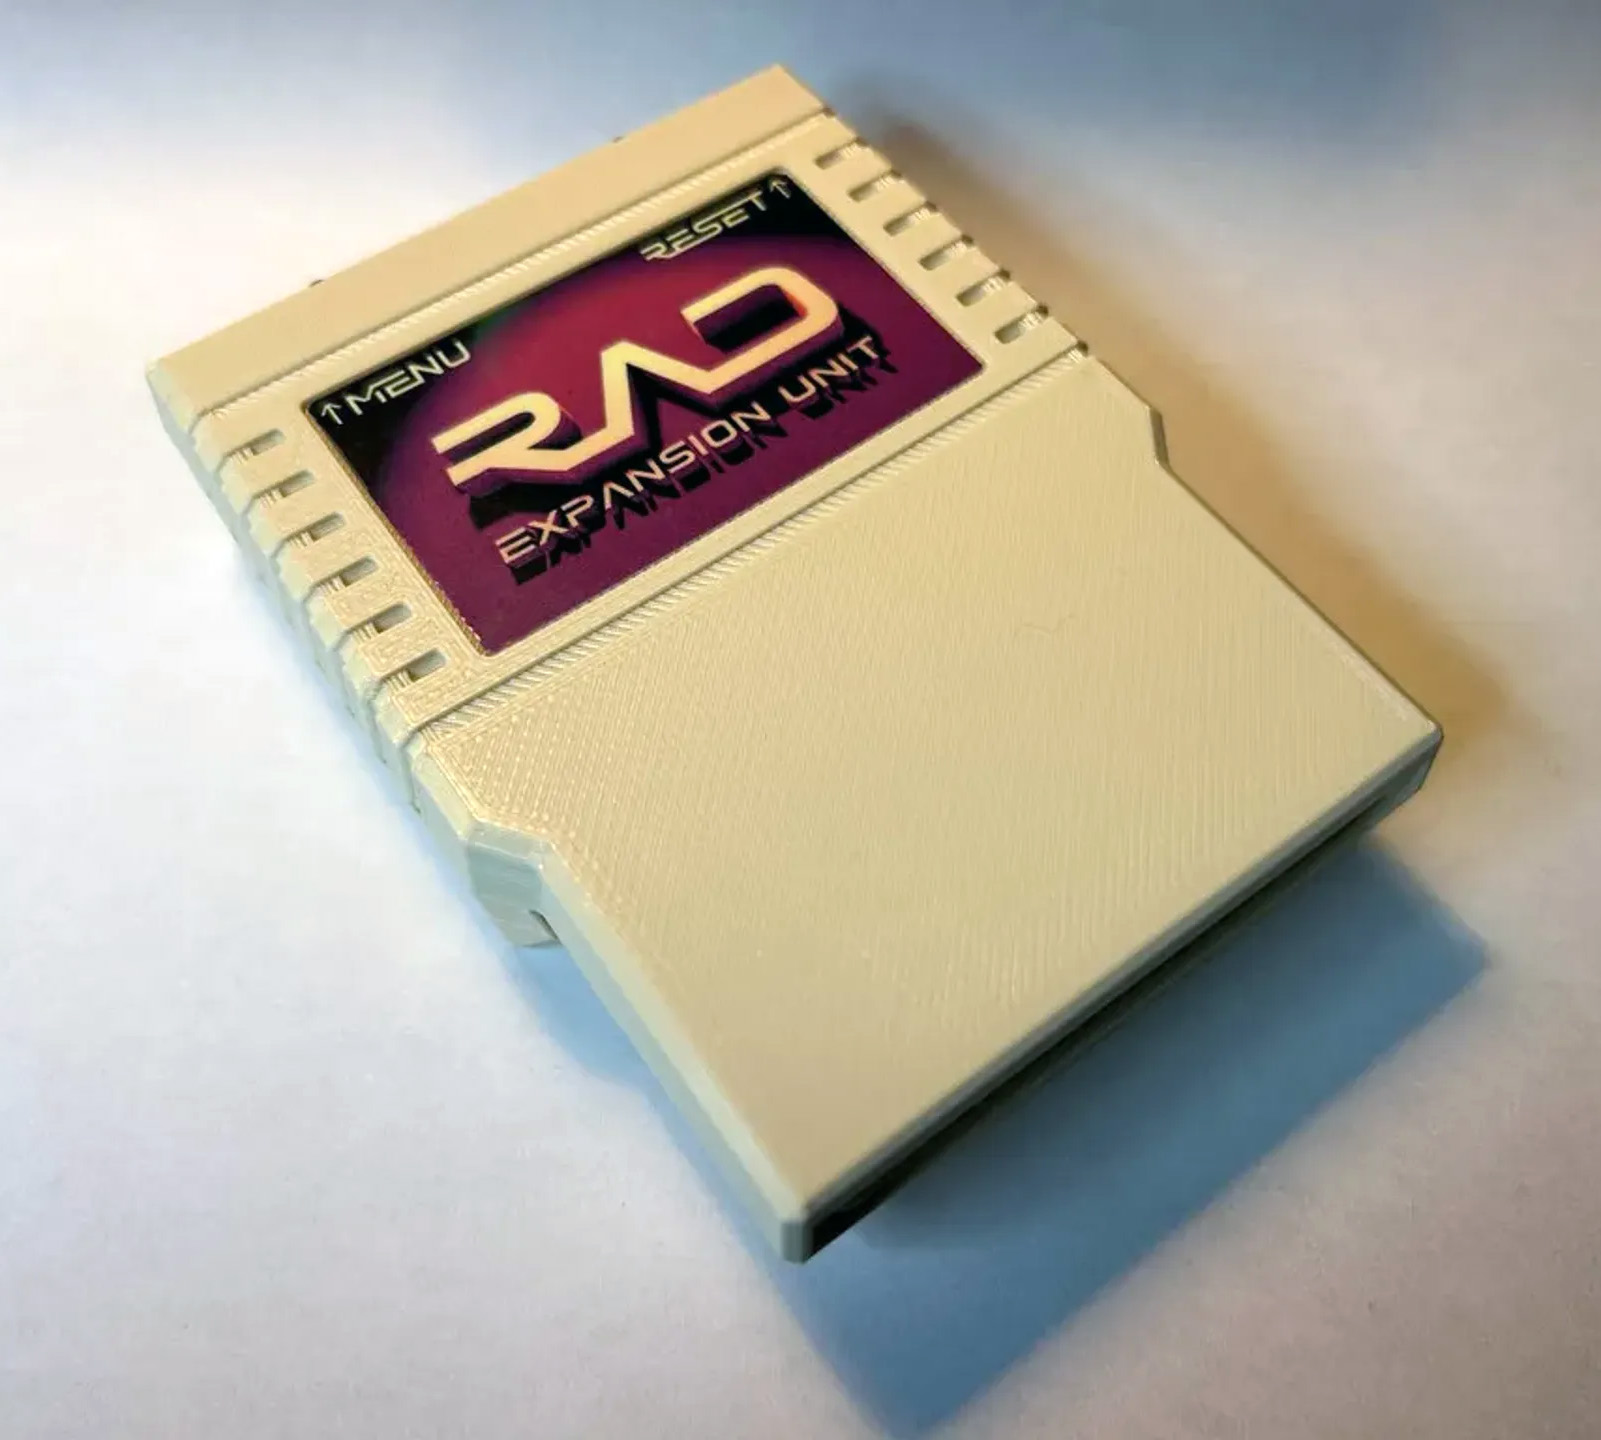
bigby has designed a case for 3D printing for both the RPi 3A+ RAD-PCB (see image above, courtesy of bigby) and the Zero2 PCB. The files can be downloaded on Thingiverse and Printables. As the PCBs have the some format as the Sidekick64 PCBs, other cases might be easy to adapt.
Simply copy the release files onto an SD card (FAT32 formatted). You might want to have a look at the configuration file SD:RAD/rad.cfg, where you can setup the preferred startup mode (menu, as REU, or as GeoRAM). Also copy your REU/GeoRAM-images and .PRGs to the respective subdirectories.
From the menu you can select/browse using the keyboard. Press 'H' for help.
If you want to change the menu music, you can replace SD:RAD/music.wav. The format is a standard .WAV-file (preferred: mono, 15.6kHz, 8-bit PCM) of max. 8mb.
Please use an external power supply for the RPi. Although the circuitry has pull-ups/pull-downs to not mess with the bus at boot time, the safest way is to boot the RAD first and then turn on the C64/C128.
Alternatively you can power the RAD from the C64/C128 using the "close to power..."-jumper. The current of the RPi has been measured and stays within the specifications of the expansion port, but (for some still unknown reason) it requires a quite strong and very stable power supply and often does not work at all. If it does and you experience any instabilities when powering from the expansion port (e.g. crashes during NUVIE-playing) it's most likely because of that. This is why I strongly recommend to use a good external power supply.
Important: NEVER power the RAD from the computer and externally at the same time. NEVER!
The Raspberry Pi configuration (SD:config.txt) overclocks the RPi (moderately for the RPi 3A+/B+, pretty significant for the Zero 2). Although I never experienced any problems with it, please be aware that overclocking may void warranty. In case you feel that RAD is not running stable, feel free to experiment with the values (some hints given in the configuration file), and let me know which settings work best for your configuration!
The bus timings and cache parameters are stored in SD:RAD/rad.cfg -- in most cases there is no need to modify these values... unless you notify glitches (e.g. when playing NUVIEs or BluREU). I experienced such with the (only) cartridge port expander (I own). In the configuration file there are alternative timings which remove these problems on my machines. It might happen that similar issues occur with other expanders or machines with other expansion port setups (SX64, which I can't test). The same counter measures should help there. Also one tester reported problems with his ASSY 250407 C64. Adjusting the timings WAIT_ENABLE_RW_ADDRLATCH and WAIT_ENABLE_DATA_WRITING (e.g. in +/- 10 steps) helped. If you experience problems, reach out for me on forum64.de.
Please keep in mind that you're not reading about a product, but my personal playground that I'm sharing. Not everything might work without glitches, in particular given the early development stage.
One known glitch is the sideborder scroller in Treulove which is not rendered correctly (contact me if you know what the reason might be).
Set up your Circle44.3 and gcc-arm environment, then you can compile RAD almost like any other example program (the repository contains the build settings for Circle that I use -- make sure you use them, otherwise it will probably not work correctly). The C64/C128 code is compiled using 64tass.
Be careful not to damage your RPi or 8-bit computer, or anything attached to it. I am not responsible if you or your hardware gets damaged. In principle, you can attach the RPi and other cartridges at the same time, as long as they do not conflict (e.g. in IO ranges or driving signals). I recommend to NOT do this. Again, I'm not taking any responsibility -- if you don't know what you're doing, better don't... use everything at your own risk.
You've built it yourself? Cool, this project is for tinkerers!
If you have questions about assembling one, don't hesitate to ask!
If you can't build one yourself, you can get pre-assembled PCBs from PCBWay or from official sellers of Sidekick64/RAD/SIDKick: www.restore-store.de (all three projects), www.retro-updates.com (Sidekick64), ausvantage_online, stmlord and jamessahm on ebay (RAD).
It is also perfectly fine and appreciated if someone sells spare PCBs (populated or not) of a PCB-order or manufactures a small batch and offers them on a forum, but I expect the price tag to be lower than that of the aforementioned official sellers.
If you bought a Sidekick64/RAD/SIDKick for the same price or even more, this clearly is a violation of the license and you should ask the seller why they are not respecting open source/CC developers' licenses.
The source code is licensed under GPLv3.
The PCB is work licensed under a Creative Commons Attribution-NonCommercial-ShareAlike 4.0 International License.
The font of the RAD logo and cartridge labels build on/have been derived from Elemental End (https://www.dafont.com/elementalend.font) which is free for non-commercial use under the CC BY-NC-ND 3.0 license.
Last but not least I would like to thank a few people. This project is based on my experience with Sidekick64, please have a look for the acknowledgements there as well. In particular I'd like to thank here: my testers (emulaThor, bigby, and TurboMicha), androSID for valuable advice with ICs, Rene Stange (the author of Circle) who is always responsive and helping with special requests. Thanks also go to Groepaz for helping with insights about the C64, and the rest of the Vice team for sharing their emulator which is a great reference for emulating hardware. The default soundtrack in the menu is Molecule's Revenge by Jester (https://modarchive.org/module.php?52333), the menu uses Retrofan's system font (https://compidiaries.wordpress.com/)
Raspberry Pi is a trademark of the Raspberry Pi Foundation.