
3D Monster Maze is of course the best game for the ZX81.
I liked it so much that I wrote a version of it for the Commodore PET - http://blog.tynemouthsoftware.co.uk/2022/07/remaking-3d-monster-maze-for-the-commodore-pet.html
As always, credit to M.E.Evans for their wonderful game, and to Paul Farrow for reverse engineering it.
Now it is time to bring it to the Commodore VIC20.

It seems to be early January 2023 when I did most of the work on the VIC20 version of 3D Monster Maze. This was initially planned as an extra game to add to the Penultimate +2 Cartridge that was being prototyped at the time.
Stage 1 - Can it Work?
When I set about the Commodore PET version, there were a couple of issues to address, the screen was a different size (40x25 instead of 32x24), and was missing a couple of crucial graphics characters.
Both of those issues were resolved by rearranging the maze view to 25x25 characters with a central single square.
The VIC20 has the same lack of those particular character graphics, although it would be possible to replace those with user defined characters.
The bigger issue is the screen is now only 22x23 characters.
I considered two options. One was to make the maze 13x25 characters, and have each 8x8 character act as two characters in the maze. That would sort of fit due to the wider characters used on the VIC20, but I expected it would take a lot more effort to achieve.
The alternative was to expand the VIC20 screen to 25x25 and use the whole screen as the maze view.

The ZX81 had a largely empty rectangle to the right which contained only the score, so I thought I could just move that to the top of the screen where it seems to fit fine and is never obscured by walls or Rex.
25x25 is just about achievable in both PAL and NTSC modes, although it is very tight on NTSC. Worst case, you lose some of the outermost wall edges, but that is no real loss.

That was one of the first test screenshots, but even from that it looked like it would work. (although the bottom line had cut off some of the the left hand wall).
It does require extra memory. The normal 22x23 screen takes up 506 bytes, and can live at either 0x1000-0x11FF or 0x1E00-0x1FFF. The englarged 25x25 screen uses 625 bytes. It would overflow the 0x1E00 starting point into RAM in the 0x2000 region, which is not accessible to the VIC chip. So it has to be in the 0x1000 to 0x1270 region, which requires some shuffling around with the code that would normally start at either 0x1001 or 0x1201.
Stage 2 - Proof of Principle
The plan was to take the PET version and rework it for the VIC20. A lot of it could stay the same as it was a mix of C and 6502 assembler, equally at home on the PET or the VIC. The screen drawing and memory map were of course different.
I put something together and it seemed to fit the screen rather nicely.

At this point I was using the black and white graphics from the PET (although it would have been seen as black and green on most PET monitors).

The only change from the ZX81 version was smooth walls, although I did leave in the option to switch to crinkly walls if you wanted, to give a more ZX81 mode.

For the PET version, I left those two options in, but also added a version which was actually black and green.
For the main VIC version, I wanted to add some colour, but not too much.
I tried various options, most of which were hideous. Yellow with blue checked walls was looking like an option. (Looking back at this, I still sort of like the yellow walls)

But the blue and white seemed the best option.

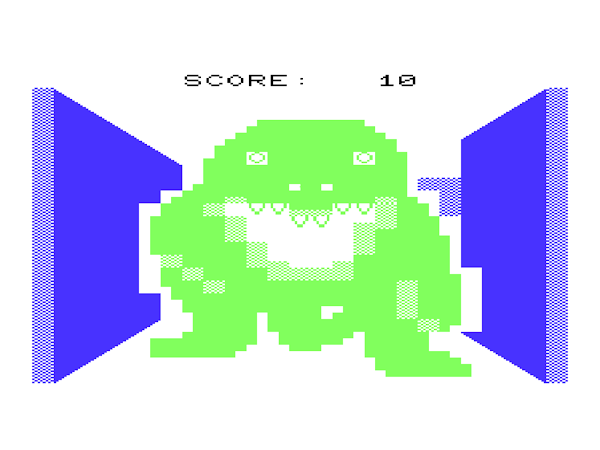
Add Rex in green and that's it sorted.
NTSC viewers get the extra benefit that the chequerboard patterns is interpreted as colour data by some monitors, so you get a lovely wallpaper.

I have again left in the option to change between the modes, with four options now:
- VIC20 colour version
- VIC20 black and white
- ZX81 style black and white with crinkly edges
- PET greenscreen style
I updated the keyboard and joystick routines for the VIC 20 and had a playable version. It wasn't very good as the drawing the screen had not been optimised, and the joystick scanning was only once a cycle, so it wasn't very fast or responsive, but there was potential for a decent game.
Stage 3 - Time Passes
Some time passed.
There was the possibility of a tape release.

More time passed.
There was the possibility of a cartridge release.
Even more time passed.
Finally, this version was added to the early test versions of the Penultimate +2 cartridge, the plan being to go back to it at some point and tidy it up and turn it into a proper release.
Stage 4 - Everything is Broken
Eventually, I had the rest of the PU+2 where it was at a pretty much complete state, so that could go out to testers to give it a run though (still with the old version of 3DMM). That gave me time to get back and finish off 3DMM.
Sadly I wasn't feeling at my best, and spent an awful lot of time dealing with a series of issues, with together thoroughly confused me.

I will spare you the detail of a couple of very long Patreon posts where I am trying to work out why it won't build any more, or why it won't run, or why it was generating invalid code etc.
Suffice to say, it was a couple of silly mistakes, some confusion with the location of the C stack, some initialisation code in the wrong place, and some debug code pasted in somehow with missing LF characters one some lines, leaving only CR characters, which the compiler apparently ignores, leading to several lines following a comment also being ignored.
It took a long time to get my head back together sufficiently to work out all those issues and get back on track.
Stage 5 - Back on Track
Once I was able to build working versions again, I was able to get back to finishing off the code.
I was able to save a lot of time redrawing the screen with a simple flag that was set only when the screen actually needed updating.
I moved the game loop timing to a timer interrupt, so it would always run 10 game cycles every second, whether it was drawing the screen or not.

I used the VIC frame line counter to work out when to redraw the screen to avoid tearing, and replaced the generic MEMCPY call with a dedicated copy routine that worked section by section copying screen and colour information alternately.
To make the joystick more responsive, I added a routine to the 60Hz interrupt to scan the joystick and process the keys in the same way as the keyboard scan routine, with key repeat. The then added any joystick movements into the keyboard buffer as if they were keypresses, which seems to work very well.
Stage 6 - Exit Pursued by Dinosaur
It has been very easy to test the "you got captured" ending as it can be difficult to avoid getting eaten.
Not much to change here, other than making the text black and keeping Rex green.

One thing I hadn't looked at on the demo was the exit screen. This was going to need a bit more work as the original versions had all the text in the rectangle on the side that I no longer have on the VIC20 version.

My initial version used the same random character patterns, but added cycling colours as well.

I didn't get to test that much, as I didn't find the exit very often during testing.

In order to help with that, I wanted to add a map view. This was very useful on the PET version, appearing on the right hand side of the display on 80 column PETs.

I decided that rather than being a static flash of the map, as in Masogs, that it should stay on screen, and actually be playable.

That adds a new aspect to the game, because you can now see Rex, and in time, work out how the AI that moves him works. (sorry to break it to you guys, but Rex isn't real, he is controlled by AI. Sorry if I reuied anyones childhood)

I used some user defined graphics to make sort of boulders for the walls, and a version of Rex (who looks unfortunately a bit like a smiley face), and also a down and right arrow to match the up and left arrows in the standard character set. These show the player and the direction they are facing. Tank controls aren't everyone's favourite, but are the only way to go in the 3D maze.

So you can then start to work out how to trap Rex, so you can make your way leisurely to the exit.

And that, of course, allows me to test the exit code a lot more easily.
I decided the combination of colours and characters was a bit busy, so I went for just colours.

The black and white and green versions still have cycling characters as before.

The text is now placed top and bottom of the "time tunnel" effect.

Once the text is cleared, I create a sort of tunnel of white light effect with the central white area expanding until it fills the screen.

Then it switches to the "mists of time" clearing, as at the start of the game and drops the character back to their start point at the bottom right of the maze.

Stage 7 - Rex Woz Ere
One oddity in the original ZX81 version is that Rex leaves a trail in the maze data as he walks around. Corridor squares have a different value once Rex has traversed them, leaving a sort of breadcrumb trail. This was never used in the ZX81 version. Maybe there was a maze view routine that was removed before release?
I show these on the map as dots, so you can see where Rex has been (also coloured green).

I did think about some kind of footprints on the 3D view, but couldn't get that to look right.
Another idea I considered was anywhere Rex had stood for a long time ("Rex Lies in Wait"), to add some graffiti to the wall, "Rex Woz Ere" type idea, but it wouldn't scale, so you would only see it on certain views and it would disappear if you got too close or too far away, so wasn't very good.

It is a shame because I would have also liked to randomly add things like "Eat at Joe's" on the walls of the maze. Sort of like the teapot in the pipes screensaver.

And of course, I wouldn't have been able to resist adding this one.

Or should that be

But sadly, that is now an easter egg for anyone that reads to the end of a long blog post, rather than in the game itself.
Stage 8 - Easter Eggs?
There are still a couple of easter eggs in the game. One is the same as the PET version (that TFW8b spoiled by showing it on the video introducing the game).
The other was also in the PET version, but was set to not happen very often. The VIC20 version however has to have this happen every time.
Lets see if anyone finds it.
The Maze view and different colours / characters are sort of easter eggs, as you would only know about them if you actually read all the scrolling instructions at the start of the game, so it is more of a reward for perseverance.

After watching TFW8b play through the game on the PET, I added a feature to the PET version that speeded up the scrolling if you pressed any keys.
I have taken that a step further for the VIC version, and just skipped to the end if you press a key.
Advertisements
Penultimate +2 Cartridge
The VIC20 version of 3D Monster Maze is exclusively avilable on the Penultimate +2 Cartridge, now in stock at The Future Was 8 bit:
- https://tfw8b.com/product/vic20-penultimate-plus-two/ (new site)
- https://www.thefuturewas8bit.com/vic20-penultimate-plus-two.html (old site)
More info in a previous post:
http://blog.tynemouthsoftware.co.uk/2023/06/penultimate-plus-2-cartridge.html

Patreon
You can support me via Patreon, and get access to advance previews of posts like this and behind the scenes updates. These are often in more detail than I can fit in here. This also includes access to my Patreon only Discord server for even more regular updates.
https://www.patreon.com/tynemouthsoftware
